HighLight Lamp Surveys
Loading a Survey
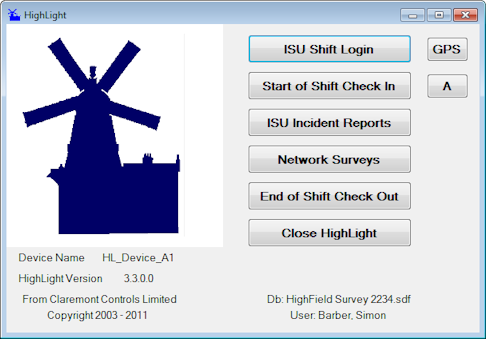
From the main display panel, select Network Surveys.
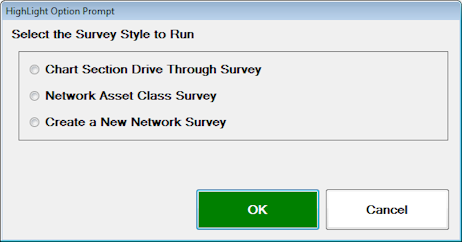
Select the Survey Style to be run, in this instance select 'Network Asset Class Survey'.
A warning message will appear regarding the GPS Signal, select 'Yes' to start GPS Tracking. (See HighLight GPS Settings for further details on how HighLight handles the GPS). This will open the HighLight Asset Survey Panel.
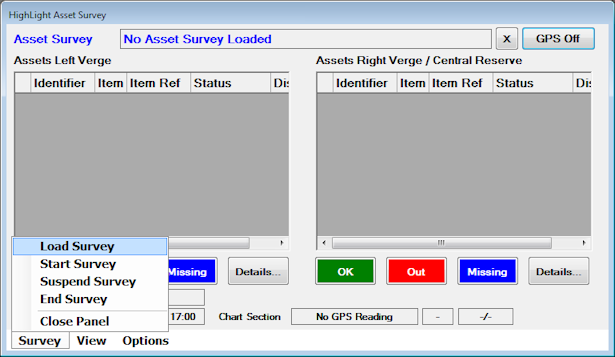
To begin the survey to be carried out, the survey must be loaded to the device. To do this use the Menu's at the bottom of the display.
HighLight will give a series of prompts, select the appropriate survey options required:
-
Survey to Open (Survey routes would normally be uploaded to the device at the start of the shift).
-
Asset Survey Option
-
Carriageway Direction
-
Order of Asset to be shown (ie Scrolling 'Top to Bottom' or 'Bottom to Top')
This opens the survey showing lamp assets on the left and right fields of the display corresponding to the Left verge and right central reservation.
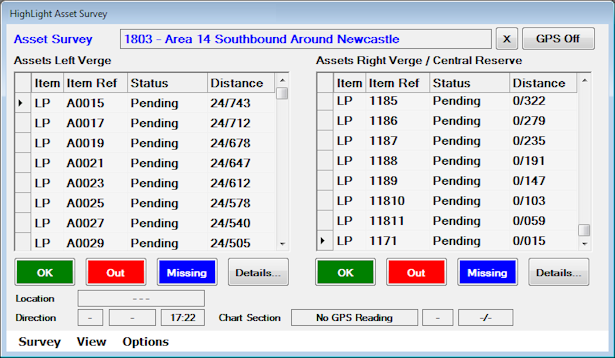
The panel displays shows the following:
- The Survey Name caption shown in the title area.
-
Item - Shows the Asset item being surveyed. Due to limited screen size the following details only are listed:
-
Item Ref - The asset item number.
-
Status - Pending or Checked
-
Distance
-
- The GPS command button shows 'Off', 'OK', 'None' depending on the current status. Normal live state is 'OK' when the device is actively monitoring the current location. The GPS may be suspended temporarily (e.g. for manual operation of location) by the User at any point during the survey. If the device has no GPS capability then this will show 'GPS '.
-
The are four prime command buttons to record data against the asset as the survey progresses.
- OK- This is the default setting.
- Out - To tag the Asset item appropriately when surveyed.
- Missing - To indicate the asset item was not present.
-
Location and Direction Details
-
Location - where a GPS signal is being received and processed this will show:
-
Current location as a Grid reference 'SU1234567890'.
-
If the device is outside the Network region (being taken for a ride, or out to sea) then the Grid ref conversion will fail and location will be given as longitude / Latitude.
-
-
Direction - Vehicle driving direction, N, NW, W, SW, S etc. Not shown if the vehicle speed slows to walking pace or no GPS is in use.
-
Vehicle speed in kph (click on the label to toggle to/from mph). Not shown if the vehicle speed slows to walking pace or no GPS is in use.
-
Time - taken off the GPS if available - or the Device time if not.
-
-
Other Command Buttons
-
Details - Pertinent to walk through inspections where detailed information can be collated regarding the asset.
-
To begin the survey, select 'Start Survey' from the Survey Menu Item. The survey will begin scrolling from the bottom up (previous selection option), checking off the lamps as the drive through is progressed. The default is OK, however at any point, left or right lamp assets can be tagged with 'Out' or 'Missing' as shown below.
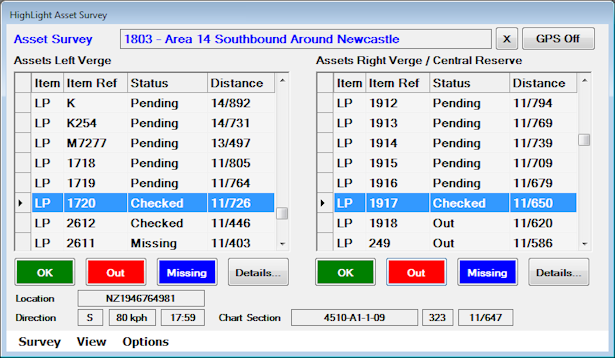
The survey will continue until either the end of the survey or the survey is suspended or stopped by the user from the Menu Item 'Survey'.
Details Command Button
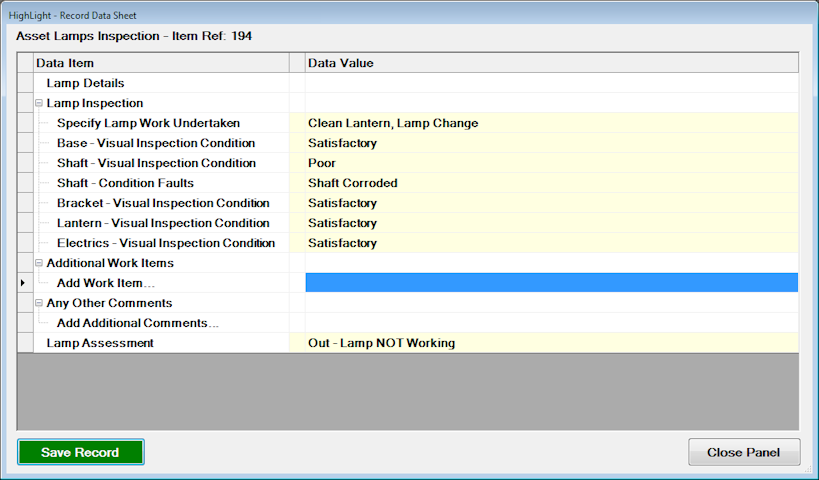
On a Walk through survey (detailed inspection), HighLight can record such details using the prompt mechanisms (pre-configured list). By selecting the first item on the prompt list - 'Specify Lamp Work Undertaken', HighLight will take the user throough a series of prompt options to record information regarding the asset.

Select Lamp Work Undertaken, multiple selections are permitted.
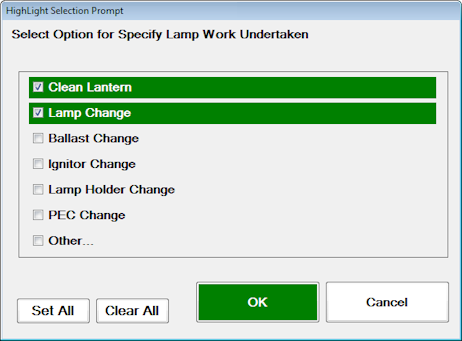
The inspections are catagorized as below.
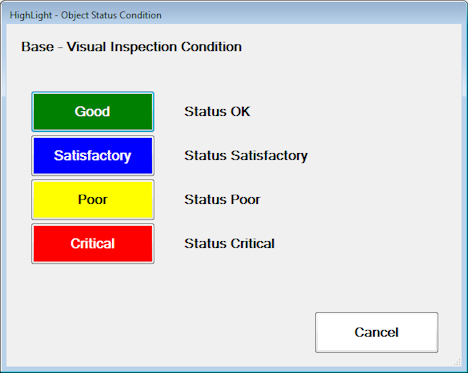
If Poor or Critical condition is selected, HighLight will prompt the user for more specific information.
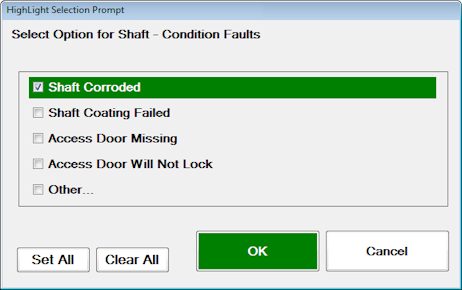
All items will be prompted in sequence until the form is completed. Selecting 'Cancel' will go back to the main inspection screen for the asset.
